
Ow. Ow. Even though contractors are hip deep in our first floor bathroom renovation, we still have plenty of projects of our own, including (ow ow) framing in the niches where the radiators used to be, so that the plasterers can make them flush with the walls. This, as always, turned out to be more complex than we ever imagined.
Background: we didn’t want to find a plasterer ourselves and so had put off this project, but we’ll have one coming in to finish the walls and ceiling in our new shower. So we decided we would take advantage of his coming to have him do the work. And it turns out to be affordable, provided that we do the basic framing ourselves. So on Saturday we cleaned out all the broken plaster from the niche, which turned out to be pretty much all of it, measured, and cut the 2x4s to length. Then I started swinging a framing hammer, and learned about slow progress. Really slow project. Fortunately we finished the dining room one and I even hung a box for the outlet.
Then things started to slow down. We had to remove trim from each of the other openings—intact, if possible, since we would need to reuse it once the plastering is complete. And in some cases we needed to bring up floorboards, since we had some floor to replace where there was some water damage and need to reuse the good boards to patch the bad ones.
Then there were the two pipes, that, in spite of all our HVAC installers’ efforts, were still too high to lay floor over. Fortunately our contractor volunteered to knock one off during his lunch hour—seeing that otherwise his plasterer wouldn’t be able to finish his job. And tonight I got another one done, in spite of a nightmare of bad angles and sheer fright. (Handling a reciprocating saw to cut a few inches off a loose cast iron pipe just below our bedroom floor ranks as my least home improvement chore ever.)
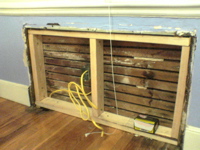
But that’s done, and all the lumber is cut to length. Now I just need to rig a jig so that I can use my circular saw to trim about 5/8ths of an inch off each piece, so that the blueboard will lay flush with the wall surface or below it. A few shots of the progress here, including the shower stall pre-rough piping and tile.